|
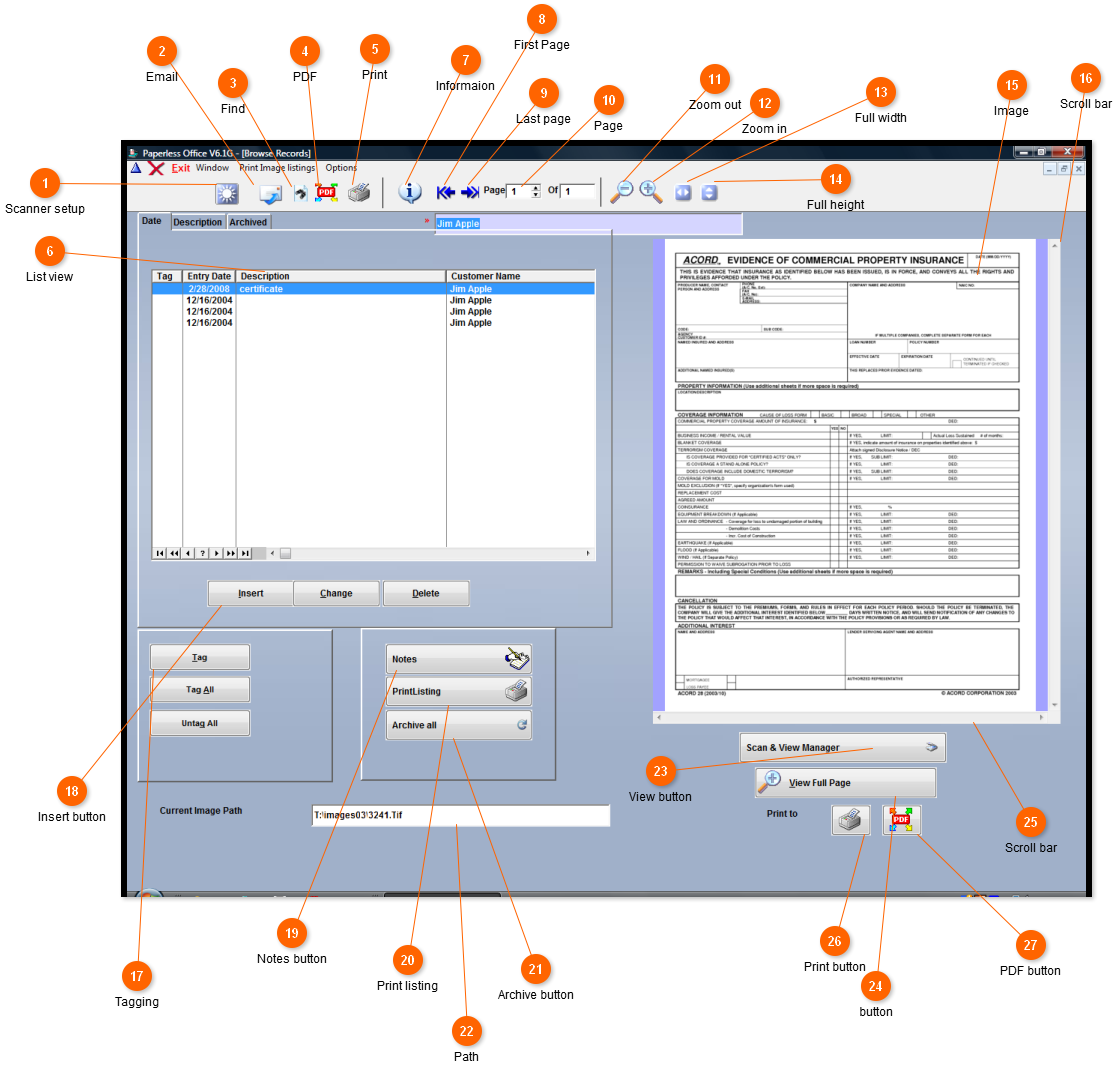
This screen will allow you to view all images for a client. You can also add new images from here.
Next page
 Scanner setup
This button takes you to a screen that will allow you to setup your scanner. This is the first thing to do in this section.
| |
 Email
This will allow you to create a PDF from all tagged images. It will then let you email the PDF.
| |
 Find
This button takes you to a screen that shows all images for all clients. You can then search for specific things. For example you might want to search for a specific description for a range of dates. That can be done through this button.
| |
 PDF
This creates & displays pdf's for the tagged images. Once the pdf is created you can save, print or email as you could with any file.
| |
 Print
This will allow you to print the highlighted record.
| |
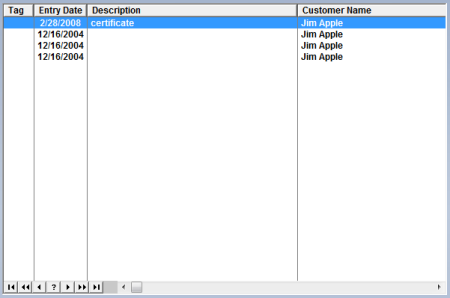
 List view
This will list all images. You can change which images and the order they are displayed by clicking on a tab above. You can also change the order by clicking on a column heading.
| |
 Informaion
This button supplies information on the image. Such as path file size date created and last accessed.
| |
 First Page
This will move you to the first page of the image,
| |
 Last page
This will move you to the last page of the image.
| |
 Page
Shows which page of the image you are on. You can use the up down arrows to move through the pages of the image,
| |
 Zoom out
Move out from the image.
| |
 Zoom in
Make the image larger.
| |
 Full width
This displays the image in its full width.
| |
 Full height
This displays the image in its full height.
| |
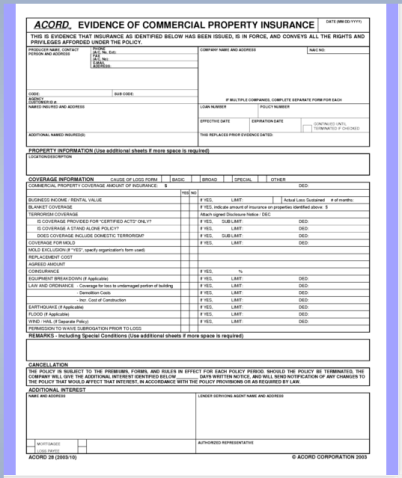
 Image
The image is displayed here
| |
 Scroll bar
Scroll up and down the image.
| |
 Tagging
 allow something to be done to all tagged images. For example: you could tag a number of images and email all of them.
| |
 Insert button
Add another image to this client.
| |
 Notes button
Add a note to the highlighted record.
| |
 Print listing
Print a listing of all images. This will include the date they were scanned.
| |
 Archive button
This will move all images to the archived tab. You might want to do this every year as the policy renewals. This way you will only see the current year on the scree. You can see previous years by going to the archived tab.
| |
 Path
Shows the path a image will be scanned to. This can be set or changed by clicking insert. You will see a path button on the next screen.
| |
 View button
This takes you to a screen that allows you to view the image in a larger pane. You can also add additonal pages to a image, delete pages from a image and perform other functions on the image,
| |
 button
<TODO> Insert description text here... And don't forget to add keyword for this topic
| |
 Scroll bar
Scroll horizontal through the image.
| |
 Print button
Print the image.
| |
 PDF button
Convert the image to a pdf. It will then be displayed in your pdf viewer. This is also, a good way to view a images.
| |
|
|