This screen will allow you to setup different profiles for your scanner. For example you will want one for Black & white letter size. You might also want on for legal. You will probably set one up for legal.
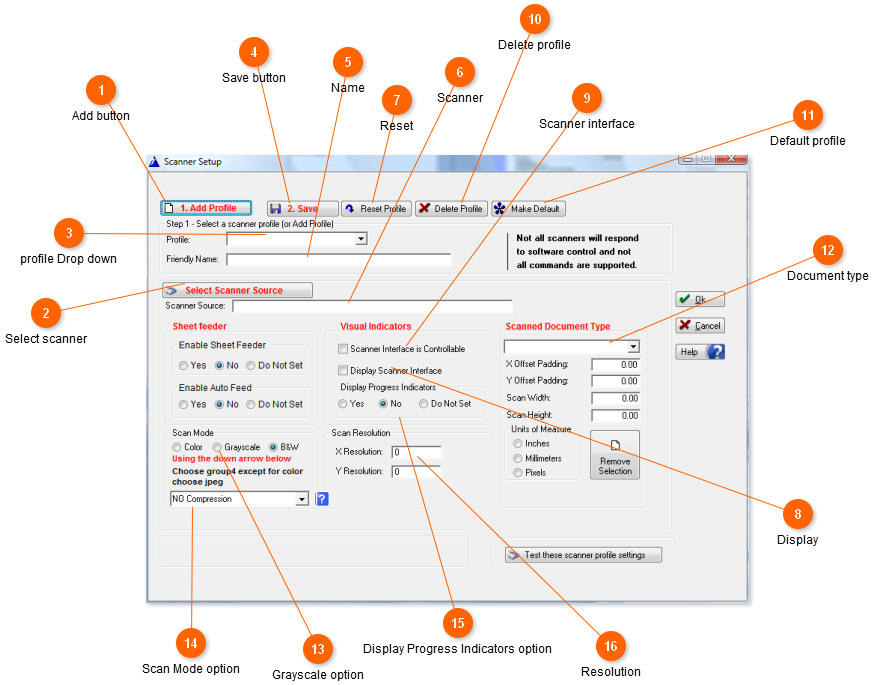
 Add button
This is the first place you click to add a new profile. This will walk you through setting up the scanner.
|
 Select scanner
This will select which scanner to use. Most scanners will have 2 choices here. A wia scanner and a twain scanner. The different drivers will give different results. If your scans are not as expected then changing the scanner source.
|
 profile Drop down
This will show a list of all profiles. You can click on the profile you want to use.
|
 Save button
Will save the current profile. It will also ask if you want to set this as the default.
|
 Name
You will set a name you will understand for the profile. Like Black & White letter size.
|
 Scanner
This will display the scanner source you have chosen.
|
 Reset
Clear setting and reset this profile.
|
 Display
This will display the scanner interface. It is best to leave this unchecked.
|
 Scanner interface
This will indicate if Amsoft can communicate with the scanner. You can not change this field.
|
 Delete profile
Delete the current profile.
|
 Default profile
Make the current profile the on you will use next.
|
 Document type
This drop down will give you many choices. Some of them will be letter size, legal size, along with many photo sizes.
|
 Grayscale option
<TODO> Insert description text here... And don't forget to add keyword for this topic
|
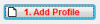
 Scan Mode option
Use this to set the compression for the image. The more compression the smaller the image. For color images you should use jpeg. For black & white you should use Group 4 compression. These are available when you click on the arrow.
|
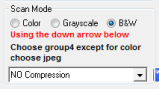
 Display Progress Indicators option
This will show a screen showing progress of the scan.
|
 Resolution
The higher the resolution the better quality of the image. However, the higher the quality the more space that will be reuired to save it. We suggest you start with 125 by 125. If it is not clear enogh move it up by 25 untill you are happy with it. There should be no need to go over 300 by 300.
|