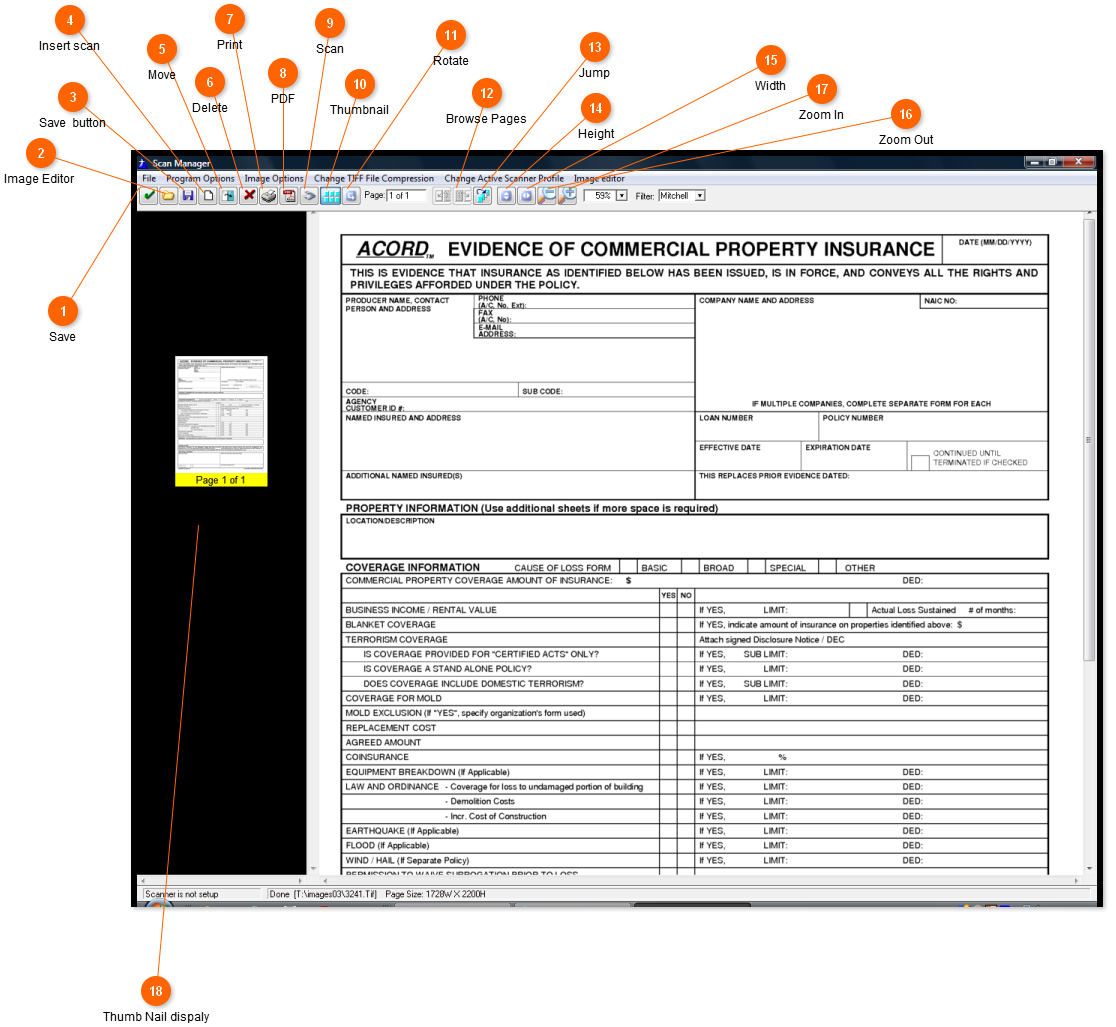
This is the scan manager. The above is what you will see after scanning a image or viewing a image.
 Save
Clicking here will save the image to the default path and display it in the list of images.
|
 Image Editor
This will take you to a screen where you can edit the image or add a image from any source.
|
 Save button
This saves the images to a different location.
|
 Insert scan
This scan a image and insert it as any page or replace the current image.
|
 Move
Moves this page forward or back.
|
 Delete
 the current image.
|
 Print
Print the current image.
|
 PDF
Create a pdf.
|
 Scan
Scan a new page as the last page.
|
 Thumbnail
This will turn the thumbnails on and off. The thumbnail is the small image in the left column.
|
 Rotate
This will rotate the image but not save it.
|
 Browse Pages
This button will allow you to move Back & Forth between the pages in the image.
|
 Jump
Alows you to jump to a specific page.
|
 Height
Dispaly the image in full height.
|
 Width
Display the image in full width.
|
 Zoom Out
Zoom out.
|
 Zoom In
Zoom
|
 Thumb Nail dispaly
A thumbnail can be displayed here for each page in a image. If you are working with images over 50 pages it is better to turn this off, due to speed.
|